Have you ever wondered how to make a pattern for sewing at home? It’s true, to make sewing patterns from scratch you need a lot of patience, knowledge and math. But if you want an easy way to make sewing patterns yourself – you have found the right tool! With Picknsew® customizing sewing patterns has never been more fun!
But if you still want to try to make sewing patterns by hand you can check out how to make a Sewing Pattern or if your looking for a simple way to make a quick sewing pattern you can make sewing patterns by tracing an existing garment. But the easiest and most convenient way to customize and make your own sewing pattern, that is even made to your measurements, is using the 3D Sewing Pattern Designer on Picknsew®. Here you can find out how it works:
How to create a made-to-measure sewing pattern with Picknsew® – A step by step tutorial
Content “How to make a pattern for sewing by using Picknsew®”:
1. Pick a garment you love
2. Make your own sewing pattern
3. Buy your design
4. Provide your measurements to make a made-to-measure sewing pattern
5. Get your customized sewing pattern
Step 1: Pick a garment you love
You can either choose to browse our Sewing Patterns tab or go directly to the 3D Sewing Pattern Designer Tab to pick between the available sewing pattern bases.
Pick your favorite garment as a base and click “Design Now” to continue to the next step and start the 3D Sewing Pattern Designer.
A 3D view of the selected sewing pattern will be shown on the left if you chose the 3-D Sewing Pattern Designer Tab. By clicking on the info icon in the lower right corner you can check out a detailed description of the sewing pattern.
If you decided to browse the sewing pattern tab you will get a 3D Preview when clicking though the pictures and you will find all the information about the pattern below.

Step 2: Make your own sewing pattern
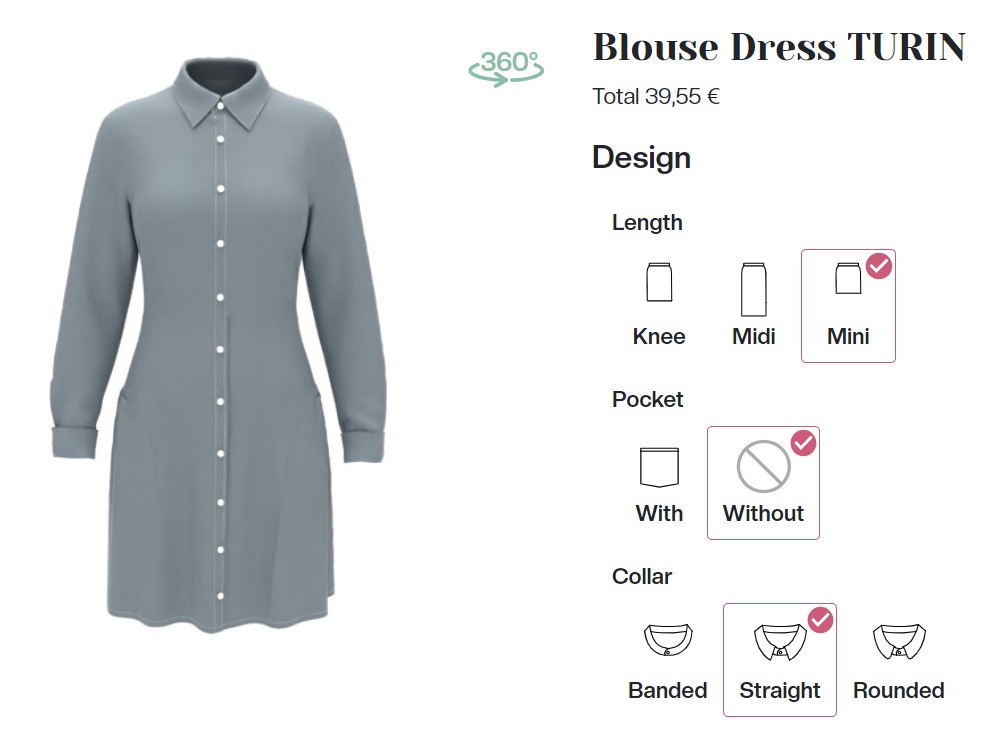
Now you can get creative and make your sewing pattern by choosing from different sleeves, necklines, lengths and much more on the right under the Design drop-down menu.
The 3D Sewing Pattern Designer will show you what the final garment will look like on the left. You can use your mouse to turn the design by 360° to look at your design from all angles!
You can save your design at any stage by clicking “Save your design” below the visualization. Your can find all your saved designs in your user account. If you want to add your design to cart right away, simply pick the format you want your sewing patter to be delivered to you and click Add to cart. You will have to provide your measurements after the checkout process, so be sure to check back on how to enter your measurements.
If you want to complete your project with the right fabric and buttons or zippers you can choose to add matching fabrics and haberdashery to your project below the design dropdowns. The fabric you choose will also be visualized on the 3D Designer, so you can experiment with lots of different patterns and colours! If you do not want to add fabric to the design simply choose „No Fabric“.
Finally, choose your sewing pattern format. PDF documents will be sent to you via email to print yourself at home, while printed paper sewing pattern will be sent via mail.
Step 3: Buy your design
You can now find your selected pattern, the materials you added, and the selected sewing pattern format in the shopping cart.
If you selected fabrics and/or haberdashery, we make sure that you will get the correct amount for your specific project and body measurements. Please note that we calculate with a standard material quantity in the cart. You are likely to receive more fabric than the amount in the cart with no extra costs.
If you would like to add more materials, e.g., for another project, simply increase the quantity of this material in the cart, manually. We calculate the added amount and you will get it on top of the amount that is needed for the chosen sewing patterns.
Proceed to checkout and finish your order.
Step 4: Provide your measurements to make a made-to-measure sewing pattern
After you have completed the check-out, follow these 4 steps to complete your order whenever you have a quiet minute and a measuring tape at hand:
1. Go to www.picknsew.com/my-account/ and log in with the username and password you received in an email. Continue with step 4 if you want to use an existing measurement profile.
2. Navigate to “My Measurements” and “New Profile”. Edit the profile by clicking on the pencil.
3. Fill in all your body measurements on the right, then click “Save”. If you need help on how the measurements are taken you can watch the corresponding video tutorials or go to How to measure yourself in 7 Steps. Make sure to insert all measurements since an incomplete measurement profile can not be used.
4. Navigate to “My Designs”. Find the design you ordered and assign the measurement profile to the design by clicking on the pattern button.
If you have any questions, visit our FAQ site to see step-by-step instructions with helpful screenshots.
Step 5: Get your customized sewing pattern!
We will now generate your custom sewing pattern and send it to you within a few working days. PDF sewing patterns will be sent to you via email while paper sewing patterns are delivered right to your door. You do not have to worry about a thing or about calculating and making your own sewing pattern, your design is already on it’s way!
Happy sewing! 🙂
Customize these sewing patterns now:
-
 Kick Flared Jeans Sewing Pattern DINAFrom 24,95 €
In accordance with § 19 UStG, the invoice amount does not include sales tax.
excl. shipping fees
-
 Oversized T-shirt Sewing Pattern ANAFrom 22,95 €
In accordance with § 19 UStG, the invoice amount does not include sales tax.
excl. shipping fees
-
 Asymmetric Top Sewing Pattern LIZAFrom 22,95 €
In accordance with § 19 UStG, the invoice amount does not include sales tax.
excl. shipping fees
