Before the start
There is a large, diverse selection of zippers. But zippers are always sold in standard sizes. At home lies the perfect zipper with matching color and the right type of closure for your next sewing project, but the zipper does not fit exactly in the intended position, because it’s too long? Then shortening the zipper can be a practical and inexpensive solution.
Here you can find detailed instructions on how to shorten a zipper.
Required materials
To shorten a zipper you will need the following materials:
- sharp scissors
- Pliers (e.g. combination pliers)
- Lighter
- Tape measure
- Tailor’s chalk
- Slotted screwdriver
Determine the type of zipper
Do you have a separable zipper or a non-separable zipper? Depending on the zipper is shortened from the top or from the bottom and you should follow the correct instructions below.
Do you have a zipper with plastic teeth or a zipper with metal teeth? If you have a zipper with metal teeth, we have compiled a list at the end of our article of what you need to take particular care of here.
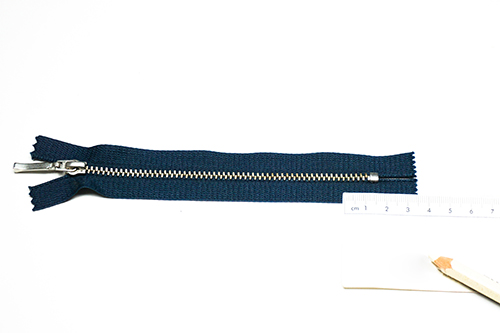
Determine the length of the zipper
Determine the desired length of the zipper. To do this, lay your sewing project, to which the zipper is to be attached, flat on a plane surface and consider how much you want to shorten the zipper.
Note whether you have a separable zipper or a non-separable zipper. Now follow the appropriate instructions.
Shorten divisible zipper
If the separable zipper is with plastic teeth, then it is shortened from the top.You can learn how to shorten a divisible metal zipper below in the “Shorten Metal Zipper” instructions.
How it works:
1) Mark the desired length with a washable chalk pen.

2) Measure 1.2 in / 3 cm up from the mark with the tape measure.

3) Open zipper and cut at the top mark with sharp scissors.
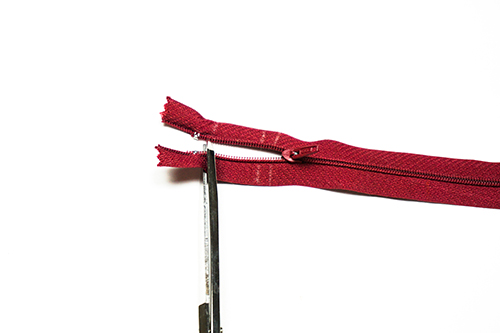
4) Cut away all the teeth of the zipper with scissors up to approx. 0.2 in / 0.5 cm above the first drawn line.
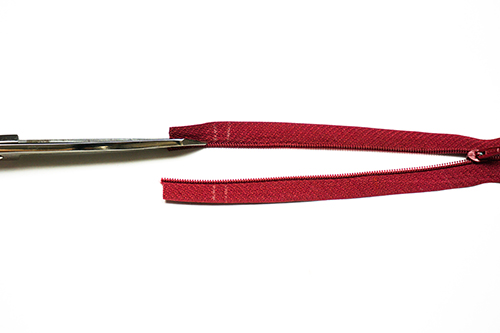
5) Melt the 0.2 in / 0.5 cm row of teeth with a lighter. This will keep the slider from sliding down.


6) Then the separable zipper can be sewn in.
Shorten non-divisible zipper at the bottom
Non-divisible zippers are shortened from the bottom, whether they have plastic or metal teeth.
1) Measure and mark desired length of zipper from top to bottom. Draw mark with a washable chalk pencil on the side edge of the fabric.

2) Sew a tight seam binding (back and forth stitching) on the marked area with needle and double thread, creating a seamline. Make sure that the seam is close to the metal teeth.


3) About 0.6 in / 1.5 cm below the seamline shorten the zipper with sharp scissors.
4) After that, you can sew in the zipper.
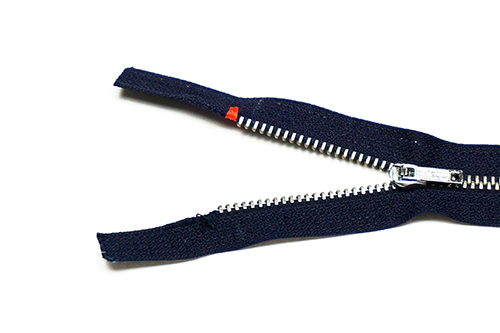
How to shorten a metal zipper
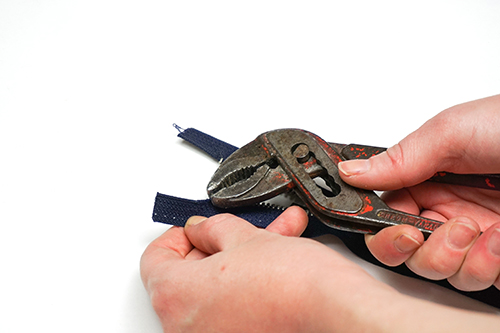
If you want to shorten a metal zipper, first follow the instructions for shortening a divisible or non-divisible zipper above. The procedure for a metal zipper differs only in the way the metal teeth are handled. We explain this here using the example of a divisible metal zipper. As described above, this is shortened from above. First remove the end pieces that are present. These are very tightly attached to the edge fabric. The best way to do this is to lay a work mat on a surface.
1) Use a slotted screwdriver to pry the end piece out of the fabric. You can then remove the end piece with the help of pliers.

2) Once both end pieces are removed, mark the desired length with a washable chalk pen.

3) Using a slotted screwdriver, lightly press the metal teeth out of the fabric and then pull them out with pliers. Remove all metal teeth up to the set mark.
There are two options for locking the metal zipper:
A) Metal zipper with seamline as a bar tack:
Use hand sewing needle with a double thread and hem the fabric with several stitches, creating a thread bead.

B) Metal zipper with metal end piece:
You will need pliers and 2 new metal end pieces. Center the end pieces in the pliers and then attach each to the end of the zipper teeth. Fix the end piece with a lot of pressure so that it sits firmly.

Then you can sew in the shortened metal zipper.
Happy sewing!